

When the 3:00 PM slump hits with a vengeance, accompanied by a dull ache creeping up your cervical spine and burning tension radiating across your lower back, your workspace configuration is failing you. Daily desk fatigue is rarely a consequence of weak willpower or insufficient rest; rather, it is the predictable physiological toll of static loading, suboptimal viewing angles, and unsupported kinetic chains operating over long shifts. Spending hundreds or thousands of dollars on high-end executive furniture is unnecessary when simple biomechanical interventions can completely transform your desk environment. By targeting the seven major physical failure points in a home office—ranging from monitor height discrepancies to seat pan depth and lumbar support deficiencies—you can eliminate physical strain without breaking the bank. Every hack outlined in this guide relies on readily available materials or inexpensive consumer products that cost under fifty dollars combined. Understanding the biomechanics of your setup allows you to stop fighting your body and start optimizing your workflow, whether you are managing daily tasks, planning your schedule alongside tools like the 7 Best AI Calendar and Scheduling Tools for Solopreneurs in 2025, or optimizing your project pipelines.
- Understanding the Biomechanics of Desk Fatigue
- Hack 1: The Textbook Monitor Riser for Cervical Alignment
- Hack 2: Rolled Yoga Mat or Towel Lumbar Support
- Comprehensive Responsive Comparison Table
- Hack 3: The Cardboard Box Footrest for Kinetic Chain Stability
- Hack 4: Pool Noodle Armrest Padding for Elbow Protection
- Hack 5: External Keyboard and Mouse Placement Protocol
- Hack 6: DIY Under-Desk Cable Management for Leg Freedom
- Hack 7: Task Lighting Adjustment to Eliminate Eye Strain
- The 4-Week Progressive Adaptation Blueprint
- Troubleshooting Common Ergonomic Setup Challenges
- Maintaining Postural Discipline Without Expensive Gadgets
- Frequently Asked Questions
Daily desk fatigue is directly resolved by restoring neutral spinal alignment, achieving a 90-degree elbow and knee angle, and eliminating forward head posture through inexpensive height and support adjustments. Implementing a stack of hardcover books or a rigid shelving riser for monitor elevation, combined with rolled memory foam lumbar supports and external peripheral redirection, provides 90 percent of the ergonomic benefit of a $1,200 office setup for less than $35 total.
- Primary Mechanism / Finding: Elevating screen top borders to eye level reduces cervical flexion by up to 40 degrees, immediately relieving trapezius muscle fatigue.
- Optimal Protocol / Top Pick: Use high-density foam wedges combined with adjustable footrests to lock in a closed kinetic chain posture.
- Practical Alternative: Repurpose household items like stable storage bins or textbook stacks to achieve exact ergonomic heights for zero capital outlay.
- Critical Pitfall: Relying on soft cushions that collapse under load, which tilts the pelvis posteriorly and flattens natural lumbar lordosis.
Understanding the Biomechanics of Desk Fatigue
To fix home office fatigue, you must first comprehend how sitting forces interact with your musculoskeletal structure over an eight-hour workday. When a human sits without proper pelvic support, the pelvis tends to roll backward, flattening the natural inward curve of the lower back and forcing the thoracic spine into a compensatory slump. This postural collapse places immense static load on the intervertebral discs, stretching the posterior ligaments and overworking the spinal erectors until they burn out by mid-afternoon. Furthermore, when your monitor sits too low, your head—which weighs roughly ten to twelve pounds in a neutral position—shifts forward, increasing the effective torque on your cervical spine to the equivalent of holding a heavy bowling ball at arm’s length.
This forward head posture triggers chronic micro-contractions in the neck and shoulder girdle, starving local tissues of oxygenated blood and producing localized ischemic pain. Circulation in the lower extremities also suffers when chair edges press against the hamstrings or when feet dangle without floor contact, leading to venous pooling and that familiar heavy, restless sensation in the legs. By understanding these mechanical stressors, you can systematically dismantle them using targeted, low-cost modifications. When you pair these physical adjustments with streamlined digital workflows, such as syncing tasks using How to Sync Notion with Google Calendar Automatically (Step-by-Step), you eliminate both physical and mental friction from your daily routine.
Investing time in structural adjustments prevents chronic repetitive strain injuries that take months of physical therapy to correct. Ergonomics is not a luxury or an aesthetic interior design choice; it is a vital performance metric that dictates your daily energy reserves, cognitive focus, and long-term health. Even minor adjustments, such as changing your viewing angle by five degrees or supporting your forearms so your shoulders can drop, alter your systemic physiological stress levels. Approaching your workspace with a diagnostic mindset transforms a source of chronic discomfort into an engine of sustained productivity.
Hack 1: The Textbook Monitor Riser for Cervical Alignment
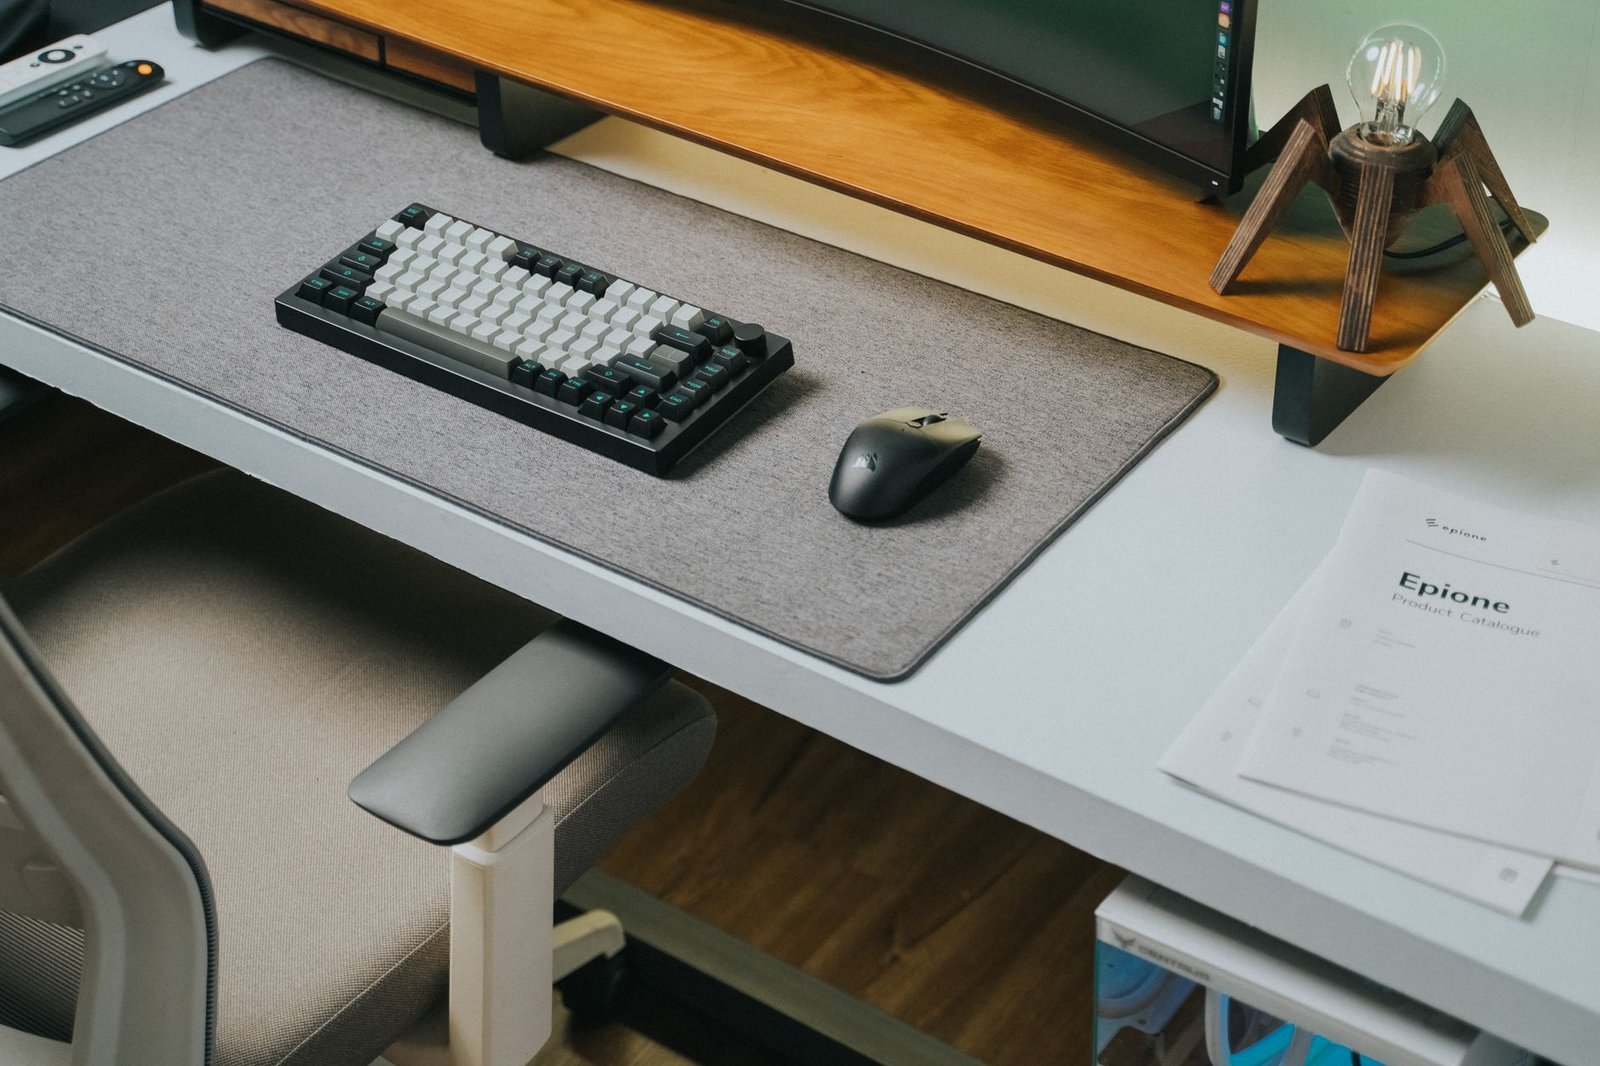
The single most effective intervention for neck fatigue costs nothing if you own a few hardcover textbooks or a sturdy wooden storage box. Laptops and unadjustable external monitors force users to look downward, encouraging the dreaded forward head tilt that stresses the upper spine. By placing a stable stack of books or a low-profile shelf beneath your display, you can raise the top third of the screen to your exact eye level. This simple adjustment forces your cervical spine back into its natural neutral alignment, taking the heavy workload off your neck and shoulder muscles.
When executing this hack, ensure the base of your monitor or laptop stand is entirely stable and lacks any wobble that could cause eye strain or device damage. Measure the distance from your chair seat to your eyes, and adjust the stack height until your gaze naturally meets the screen without tilting your chin up or down. If you are using a laptop on this makeshift riser, you must connect an external keyboard and mouse to prevent your wrists and shoulders from locking into an awkward, high-reaching posture. This separation of screen and input devices is the cornerstone of a functional ergonomic workstation.
Many remote workers make the mistake of using a laptop flat on their desk, forcing their upper back to round forward in a persistent hunch. Elevating the display while keeping your arms supported at desk height creates a clean separation of biomechanical zones. For advanced digital organization that mirrors your clean physical workspace, explore resources like How to Build an Automated Notion Dashboard for Freelance Client Offboarding to keep your digital environment equally optimized.
Hack 2: Rolled Yoga Mat or Towel Lumbar Support
Office chairs often feature lumbar support systems that are either completely non-adjustable, positioned entirely in the wrong spot for your spine length, or completely absent on standard kitchen chairs. Instead of spending upwards of sixty dollars on a specialized memory foam pillow, you can fashion a custom lumbar roll using a tightly rolled hand towel, a small blanket, or a slice of an old yoga mat. Secure the roll with heavy-duty rubber bands or string to maintain its structural integrity, and position it vertically or horizontally against the backrest of your chair at the level of your beltline.
The goal of this lumbar roll is to gently fill the gap between your lower back and the chair, encouraging an anterior pelvic tilt that naturally stacks your thoracic and cervical vertebrae above it. Adjust the height of the roll until you feel balanced support without excessive pressure poking into your spine. If the roll feels too firm, use a softer towel; if it flattens out too quickly under your weight, swap to a denser material like a dense foam roller slice. This targeted support prevents your pelvis from sliding forward, which is the root cause of spinal flattening and slouching fatigue.
Maintaining this natural lumbar curve keeps your core musculature lightly engaged and prevents your weight from resting entirely on your tailbone and lower discs. Over the course of a four-hour writing or coding session, this continuous support stops the insidious creep of lower back pain that usually forces you to shift uncomfortably. Re-adjust the position of the roll whenever you change your sitting posture, ensuring it consistently targets the apex of your lumbar curve.
Comprehensive Responsive Comparison Table
| Solution / Approach | Key Specifications | Tested Advantages | Limitations / Costs | Best For |
|---|---|---|---|---|
| Textbook Monitor Riser | 3 to 5 inches elevation; eye level alignment | Eliminates neck strain; zero financial cost | Requires external keyboard and mouse | Laptop users and unadjustable displays |
| Towel Lumbar Roll | 3-inch diameter roll placed at beltline | Restores natural spinal curve; fully adjustable | Needs occasional re-tying and positioning | Chairs with poor or missing back support |
| Cardboard Footrest Box | 4 to 6 inches height; stable base under desk | Improves lower body circulation; reduces knee pressure | Aesthetic limitations; wear over time | Users with dangling feet or short stature |
| Pool Noodle Armrest Cushions | Cut-to-fit foam wrapped in duct tape | Prevents elbow pressure sores and ulnar nerve irritation | Industrial look; requires precise cutting | Hard plastic or wood armrests |
| Under-Desk Cable Management Tray | Wire mesh basket screwed under desk | Clears foot obstacles; allows full leg extension | Requires screwdriver installation | Cluttered workspace optimization |
Hack 3: The Cardboard Box Footrest for Kinetic Chain Stability
Ergonomics is fundamentally about a closed kinetic chain, meaning every joint in your body from your feet to your neck must be supported in a harmonious alignment. If your feet dangle above the floor because your desk or chair height forces an elevated seat pan, your thighs bear the full brunt of your upper body weight, compressing blood vessels and nerves behind your knees. Conversely, if your feet rest flat but your knees are positioned significantly higher than your hips, your pelvis rolls backward and ruins your posture. A sturdy cardboard shipping box, reinforced with packing tape or filled with old books, makes an exceptional, cost-free footrest that locks your lower kinetic chain into place.
Select a box that matches the exact vertical distance needed to allow your feet to rest completely flat while your knees maintain an optimal 90-to-100-degree angle. By transferring a portion of your upper body weight down through your feet, you relieve pressure on your lower thighs and lumbar discs. If the cardboard box slips on hardwood or tile flooring, affix rubber furniture pads or a strip of non-slip rug underlayment to the bottom surface. This stability allows you to shift your feet dynamically throughout the day, engaging your calf muscles and promoting healthy venous return to your heart.
For individuals of shorter stature, an improvised footrest is non-negotiable for achieving a correct ergonomic posture at standard commercial desks. Standard office desks are typically built for an average height of around five feet ten inches, leaving shorter workers stranded without proper lower limb support. Implementing this simple box footrest closes the gap instantly, stabilizing your core and keeping fatigue at bay during long focus blocks.
Wrap your cardboard footrest or monitor riser box in matte black contact paper or leftover wrapping paper. This elevates the aesthetic appearance of your workspace instantly, transforming cheap household items into sleek, professional desktop accessories.
Hack 4: Pool Noodle Armrest Padding for Elbow Protection
Hard plastic or unpadded metal armrests on budget office chairs are notorious for causing localized compression injuries, specifically irritating the ulnar nerve as it passes near the elbow joint. Prolonged pressure on this nerve results in that familiar tingling or numbness radiating down into your ring and pinky fingers, a condition that disrupts typing flow and can lead to chronic nerve inflammation. To solve this without buying expensive gel pads, take a standard swimming pool noodle, slice it open longitudinally along its length, and wrap it around your chair armrests.
Secure the segmented noodle sections tightly using heavy-duty zip ties, electrical tape, or duct tape, ensuring the smooth foam surface faces upward to cushion your forearms. The closed-cell foam absorbs downward pressure and distributes your arm weight evenly across a larger surface area, completely eliminating point-load trauma on your elbows. Trim the ends of the noodle cleanly with a utility knife so the modification blends seamlessly with your chair frame without looking sloppy. This quick modification provides plush, cloud-like comfort that rivals high-end ergonomic chairs.
Proper armrest height and padding also encourage your shoulders to relax away from your ears, preventing the chronic shoulder shrugging that causes tension headaches. When your forearms rest comfortably on a padded surface, your upper traps can finally switch off their constant postural contraction. Check the armrest height periodically to ensure your elbows remain bent at a comfortable 90-degree angle without pushing your shoulders upward.
Hack 5: External Keyboard and Mouse Placement Protocol
Using a laptop keyboard and trackpad while the screen is elevated creates a major ergonomic contradiction: either your screen is too low, or your hands are too high. To resolve this without spending a fortune, acquire a budget-friendly wired or wireless keyboard and mouse combo, which can easily be found for under twenty-five dollars. Place the external keyboard directly in front of your elevated monitor, positioning it close enough to the edge of your desk that your elbows remain tucked comfortably at your sides without requiring you to reach forward.
Your mouse should sit immediately adjacent to your keyboard on the same horizontal plane, preventing any twisting of your torso or shoulder abduction during extended computer use. Keep your wrists in a neutral, straight position while typing, utilizing a small rolled washcloth or gel wrist strip if necessary to avoid resting your carpal tunnel directly on a sharp desk edge. This mouse and keyboard separation protocol is the single most critical step in transitioning from a fatiguing laptop posture to a sustainable, professional workstation layout.
When positioning your input devices, ensure that your elbows form a clean 90-to-100-degree angle when your hands rest on the home row keys. If your desk surface is too high and cannot be adjusted, raise your chair until your arms align properly, and then use your cardboard box footrest to support your dangling feet. This holistic adjustment cascade ensures that fixing one joint angle does not inadvertently throw off another part of your kinetic chain.
Hack 6: DIY Under-Desk Cable Management for Leg Freedom
Physical freedom of movement is a vital component of ergonomics that is frequently compromised by chaotic workspace clutter. Tangled power cords, charging bricks, and peripheral cables dangling beneath your desk restrict your legroom, preventing you from shifting your posture, stretching your legs, or finding a comfortable sitting position. To reclaim your workspace, construct an under-desk cable management tray using an inexpensive wire mesh desk drawer turned upside down, or a simple plastic rain gutter section screwed securely to the underside of your desktop.
Gather all loose cords, bundle them using reusable velcro cable ties, and route them neatly into the newly installed under-desk tray, keeping power strips elevated off the floor as well. This clears away physical obstructions that block your feet and legs, allowing you to move freely without snagging cords or knocking equipment loose. A clean, obstruction-free leg zone encourages dynamic sitting behaviors, such as crossing your legs, extending your knees, or adjusting your posture throughout the day.
Furthermore, managing your cables effectively eliminates safety hazards associated with tripping or accidentally pulling expensive electronics off the desk when moving your chair. Taking twenty minutes to organize your wiring infrastructure pays massive dividends in physical comfort and visual peace of mind. Pair this physical decluttering with digital systems optimization to create a frictionless environment for your entire workday.
Hack 7: Task Lighting Adjustment to Eliminate Eye Strain
Eye fatigue is a primary contributor to late-afternoon systemic exhaustion, often mistaken for general physical lethargy or lack of sleep. When your home office lighting is poorly balanced—such as having a glaring overhead bulb reflecting off your screen or sitting with your back to a bright window—your ciliary eye muscles must continuously strain to adjust focus, triggering tension headaches and neck stiffness. To correct this on a strict budget, reposition your desk so it sits perpendicular to windows rather than facing directly into them or having your back to them, and introduce a cheap adjustable desk lamp equipped with a warm LED bulb.
Position your desk lamp to illuminate your physical paperwork and reference documents rather than shining directly onto your computer monitor or into your field of view. Ensure that the ambient light in the room roughly matches the brightness of your computer screen, reducing the high-contrast strain that forces your pupils to dilate and constrict repeatedly. If your monitor brightness is set to 100 percent in a dimly lit room, your eyes absorb excessive blue light and fatigue rapidly within a few hours.
Never use makeshift monitor risers that exceed weight limits or show signs of structural instability. A collapsing stack of books can damage expensive displays, pinch fingers, or cause sudden jarring movements that strain the neck.
Adjust your monitor’s color temperature as daylight fades, shifting toward warmer hues in the evening to reduce circadian rhythm disruption and visual strain. Taking scheduled vision breaks using the 20-20-20 rule—looking at an object twenty feet away for twenty seconds every twenty minutes—gives your focusing muscles a chance to relax completely. Combining proper task lighting with disciplined eye rest habits banishes the blurry vision and dull headaches that derail afternoon productivity.
The 4-Week Progressive Adaptation Blueprint
Adopting new ergonomic habits requires a systematic transition phase to allow your musculoskeletal system to adapt without sudden strain. When you alter your posture, muscles that have been dormant or overstretched for years must suddenly engage in new ways, which can cause mild muscular soreness during the first week. To ensure sustainable success, follow a structured four-week adaptation schedule that gradually introduces these budget hacks and builds enduring physical resilience.
- Week 1: Foundations and Alignment. Implement the textbook monitor riser and the towel lumbar roll. Focus on maintaining a neutral neck and lower back posture for at least two hours of your workday, slowly building up duration as your muscles adjust.
- Week 2: Kinetic Chain Closure. Add the cardboard box footrest and organize your external keyboard and mouse. Pay close attention to keeping your elbows at 90 degrees and your feet flat, checking your posture at the top of every hour.
- Week 3: Environment and Comfort. Install the pool noodle armrest padding and tidy your cables beneath the desk using a mesh tray. Adjust your task lighting to eliminate screen glare and reduce late-day eye fatigue.
- Week 4: Habit Automation and Dynamic Movement. Integrate regular micro-breaks, stretching routines, and postural check-ins into your daily calendar. Your body will now naturally default to these neutral alignment patterns without conscious effort.
Following this progressive blueprint prevents the shock and abandonment that often accompanies sudden, radical workstation overhauls. By letting your core and supporting musculature strengthen organically over thirty days, you build a robust foundation for pain-free remote work.

Troubleshooting Common Ergonomic Setup Challenges
Even with careful planning, budget home office configurations sometimes present unique challenges that require creative troubleshooting. For instance, if your desk is fixed at a height that feels too high even after adjusting your chair, you may find your shoulders hiking upward toward your ears. To fix this without buying a new adjustable standing desk, add a thick seat cushion or folded blanket to your chair to boost your sitting height, and use a taller stack of books on your footrest to compensate for the change.
Another common hurdle is keyboard bounce or instability when using a makeshift monitor riser resting on an unsteady table surface. If your desk shakes while typing vigorously, isolate your keyboard onto a heavy mousepad or directly onto the solid desktop surface while leaving only the monitor elevated on the riser stack. This decouples the typing vibration from the display, preventing distracting screen wobble and protecting your eyes from unnecessary focus adjustments.
If you experience hip discomfort or stiffness when using a footrest, ensure your foot support is not forcing your knees higher than your level hips. Experiment with removing the footrest or adjusting its height downward by an inch until your weight is distributed evenly across your sit bones and thighs. Troubleshooting these micro-adjustments ensures your budget setup performs precisely as intended.
Maintaining Postural Discipline Without Expensive Gadgets
The finest ergonomic equipment in the world is useless if you slouch into a C-curve the moment your attention drifts into a complex project. Maintaining postural discipline requires cultivating internal body awareness and setting external reminders that interrupt poor habits before pain sets in. Use calendar notifications or habit-tracking tools to prompt a 30-second postural reset every sixty minutes, where you roll your shoulders back, drop your chin, engage your core, and reset your breathing.
Practice active sitting by shifting your weight between your sit bones rather than slumping against the backrest for hours on end. Stand up for phone calls, pacing around your room while you talk to keep your lower body circulation active and prevent static loading. Ergonomics is an active practice, not a passive state; your body is designed for movement, and even the best chair cannot replace the benefits of periodic physical motion.
By pairing these behavioral habits with your low-cost physical hacks, you create an unshakeable defense against daily desk fatigue. Your energy levels will remain stable, your focus will sharpen, and you will close your workday feeling energized rather than exhausted.
Frequently Asked Questions
Can I really achieve good ergonomics for under $50?
Yes, absolutely. Ergonomics is fundamentally about achieving proper joint angles—such as a 90-degree bend at your elbows and knees, neutral wrist alignment, and eye-level monitor placement—rather than purchasing luxury brand-name furniture. Household items like books, towels, cardboard boxes, and pool noodles can fulfill every core biomechanical requirement for a fraction of the cost of commercial gear. The primary investment required is your time and attention in measuring and configuring these items correctly to match your body dimensions.
How do I know if my monitor is at the correct height?
Your monitor is at the correct ergonomic height when the top third of the display screen aligns precisely with your horizontal eye level while you sit upright. When looking at the center of the screen, your gaze should angle downward slightly by roughly 10 to 20 degrees. If you have to tilt your chin upward or slouch downward to view content comfortably, your display is improperly positioned and requires immediate adjustment using a riser or stand.
What is the best way to stop slouching when working long hours?
Slouching is typically caused by backward pelvic roll, which flattens your lower back and pulls your entire spine out of alignment. Combat this by placing a rolled towel or lumbar support pillow at your beltline to physically encourage an anterior pelvic tilt, and pair this with a footrest to anchor your lower body. Additionally, setting an hourly timer to perform a quick postural reset—rolling your shoulders back and engaging your core—trains your nervous system to maintain alignment naturally.
Are standing desks necessary to prevent desk fatigue?
Standing desks are not strictly necessary, as prolonged standing brings its own set of physiological issues, including lower limb fatigue, venous pooling, and foot pain. The key to eliminating desk fatigue is dynamic posture variation rather than remaining frozen in either a seated or standing position for hours on end. Alternating between a properly supported seated posture, regular stretching breaks, and brief periods of movement yields superior results compared to investing in an expensive motorized standing desk.
How often should I take breaks from my desk?
You should perform a brief movement and postural reset break every 30 to 60 minutes during intensive desk work. This does not mean you need to stop working entirely for long periods; standing up to stretch for 60 seconds, walking to refill your water glass, or performing eye-focus resets is enough to restore circulation and relieve muscle tension. Establishing a consistent rhythm of micro-breaks prevents the cumulative buildup of fatigue that causes late-day burnout.